Use the Agents window (Preview)
The Agents window is a dedicated window in VS Code, built for an agent-first workflow. It's the natural complement to the VS Code editor window: the editor window is optimized for code-centric work in a single workspace, while the Agents window is optimized for orchestrating higher-level tasks across projects, with chat and the sessions list as the primary interface.
The Agents window gives you access to all your workspaces from one place and lets you run and track multiple sessions in parallel across your projects without opening each workspace in a separate window. It shares the same agent sessions, settings, and keybindings with the main VS Code window, so you can move freely between an editor-focused workflow and an agent-focused workflow at any time without losing context.
In this article, you learn about the Agents window and how to start and manage agent sessions across your projects. For chat mechanics that apply to both the Agents window and the Chat view — such as sending requests, adding context, and reviewing changes — see Use chat in VS Code.
The Agents window (agent-first) and the Chat view (code-first) are the main surfaces for working with agents. They share the same sessions and settings, so you can move freely between them. For help choosing, see Choose how you work with agents.
The Agents window is currently in preview. We're actively shaping it based on your feedback and are excited to learn alongside developers. Please share your experience by filing issues on GitHub, or browse existing issues.
Prerequisites
- Visual Studio Code installed. Download VS Code.
- Access to GitHub Copilot. Follow the steps in Set up GitHub Copilot in VS Code to sign in and activate your subscription.
Open the Agents window
The Agents window opens as a dedicated VS Code window alongside your main editor window. To open the Agents window, use one of the following methods:
-
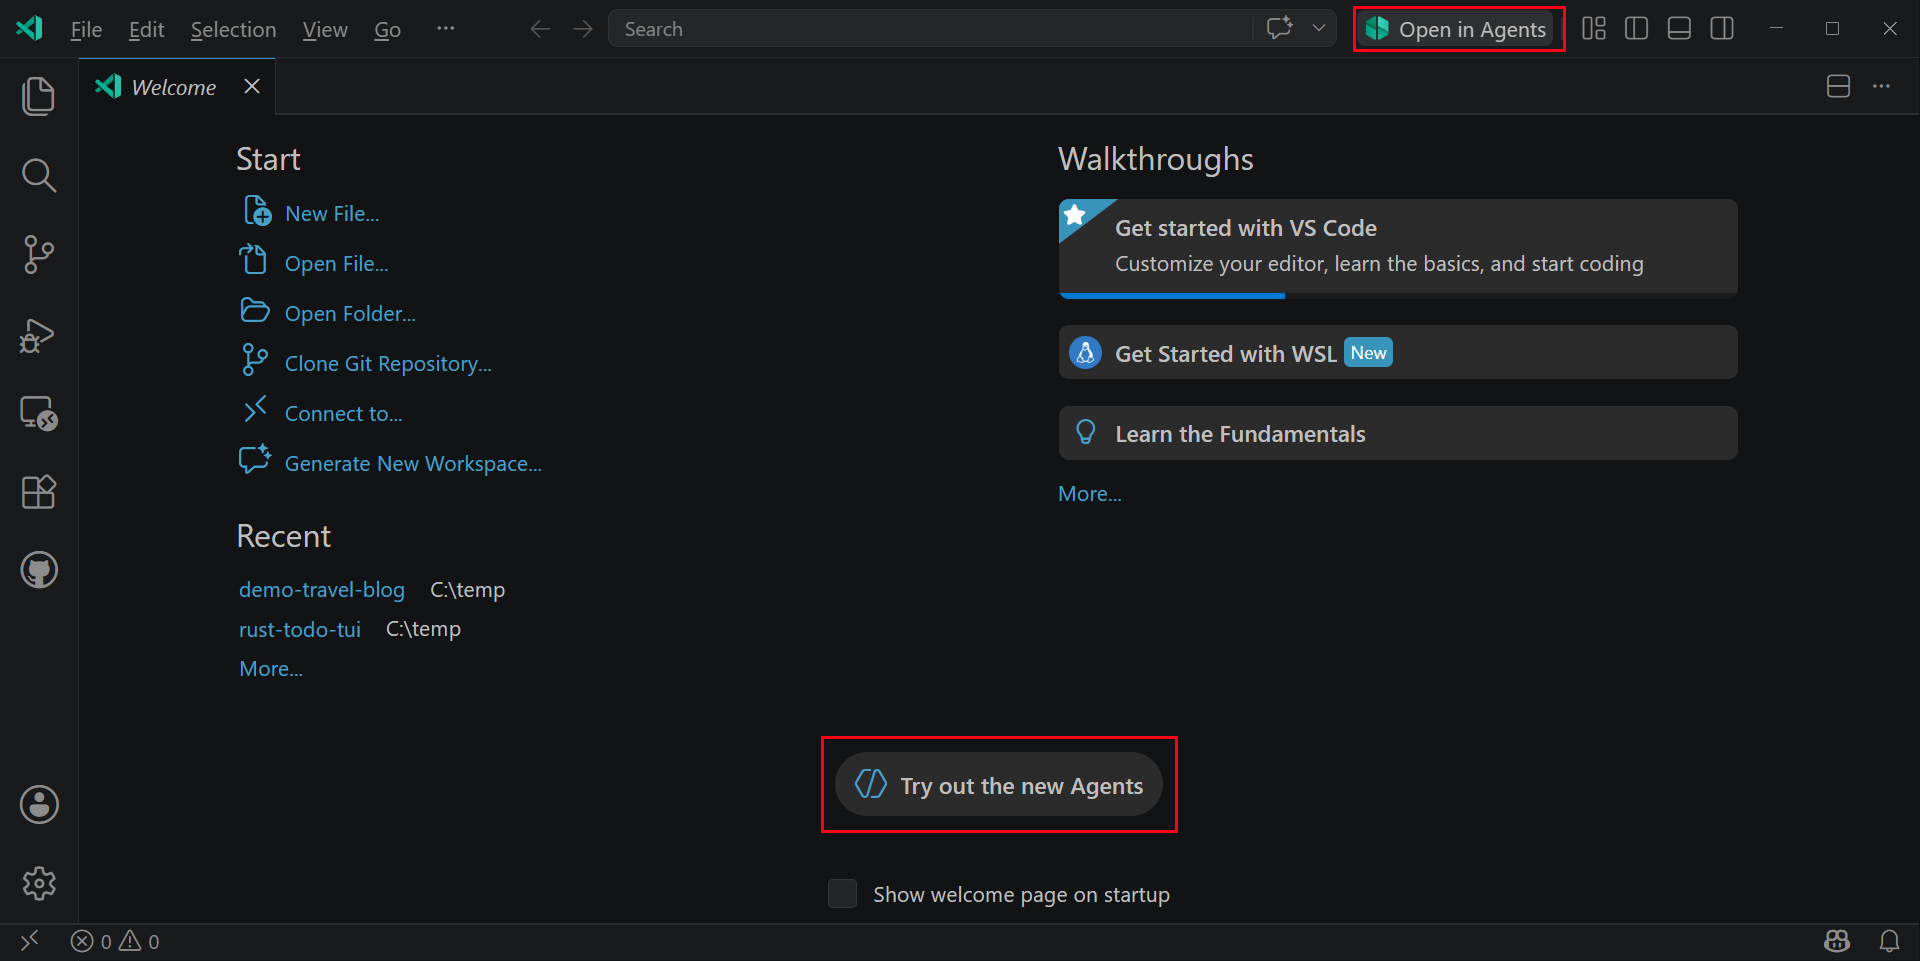
In VS Code, select the Open in Agents button in the title bar, or run Chat: Open Agents Window from the Command Palette (⇧⌘P (Windows, Linux Ctrl+Shift+P)).
You can also open the Agents window directly from the VS Code welcome page.
-
Run
code --agentsfrom the command line. -
Open https://insiders.vscode.dev/agents in a browser to use the Agents window from any device. See remote agent sessions for setup instructions.
The Agents window requires GitHub authentication to access your Copilot subscription and sessions. If you're already signed in to GitHub in VS Code, you'll also be signed in when the Agents window opens.
If you prefer to stay in the editor window full-time, you can hide the Open in Agents button by right-clicking it in the title bar and selecting Hide 'Open in Agents'. You can still open the Agents window at any time from the Command Palette or command line.
Interface overview
The Agents window picks up your existing Copilot CLI, Cloud, and Claude agent sessions across your workspaces. You can switch between agent sessions across the different workspaces without needing to open each workspace in a separate window.
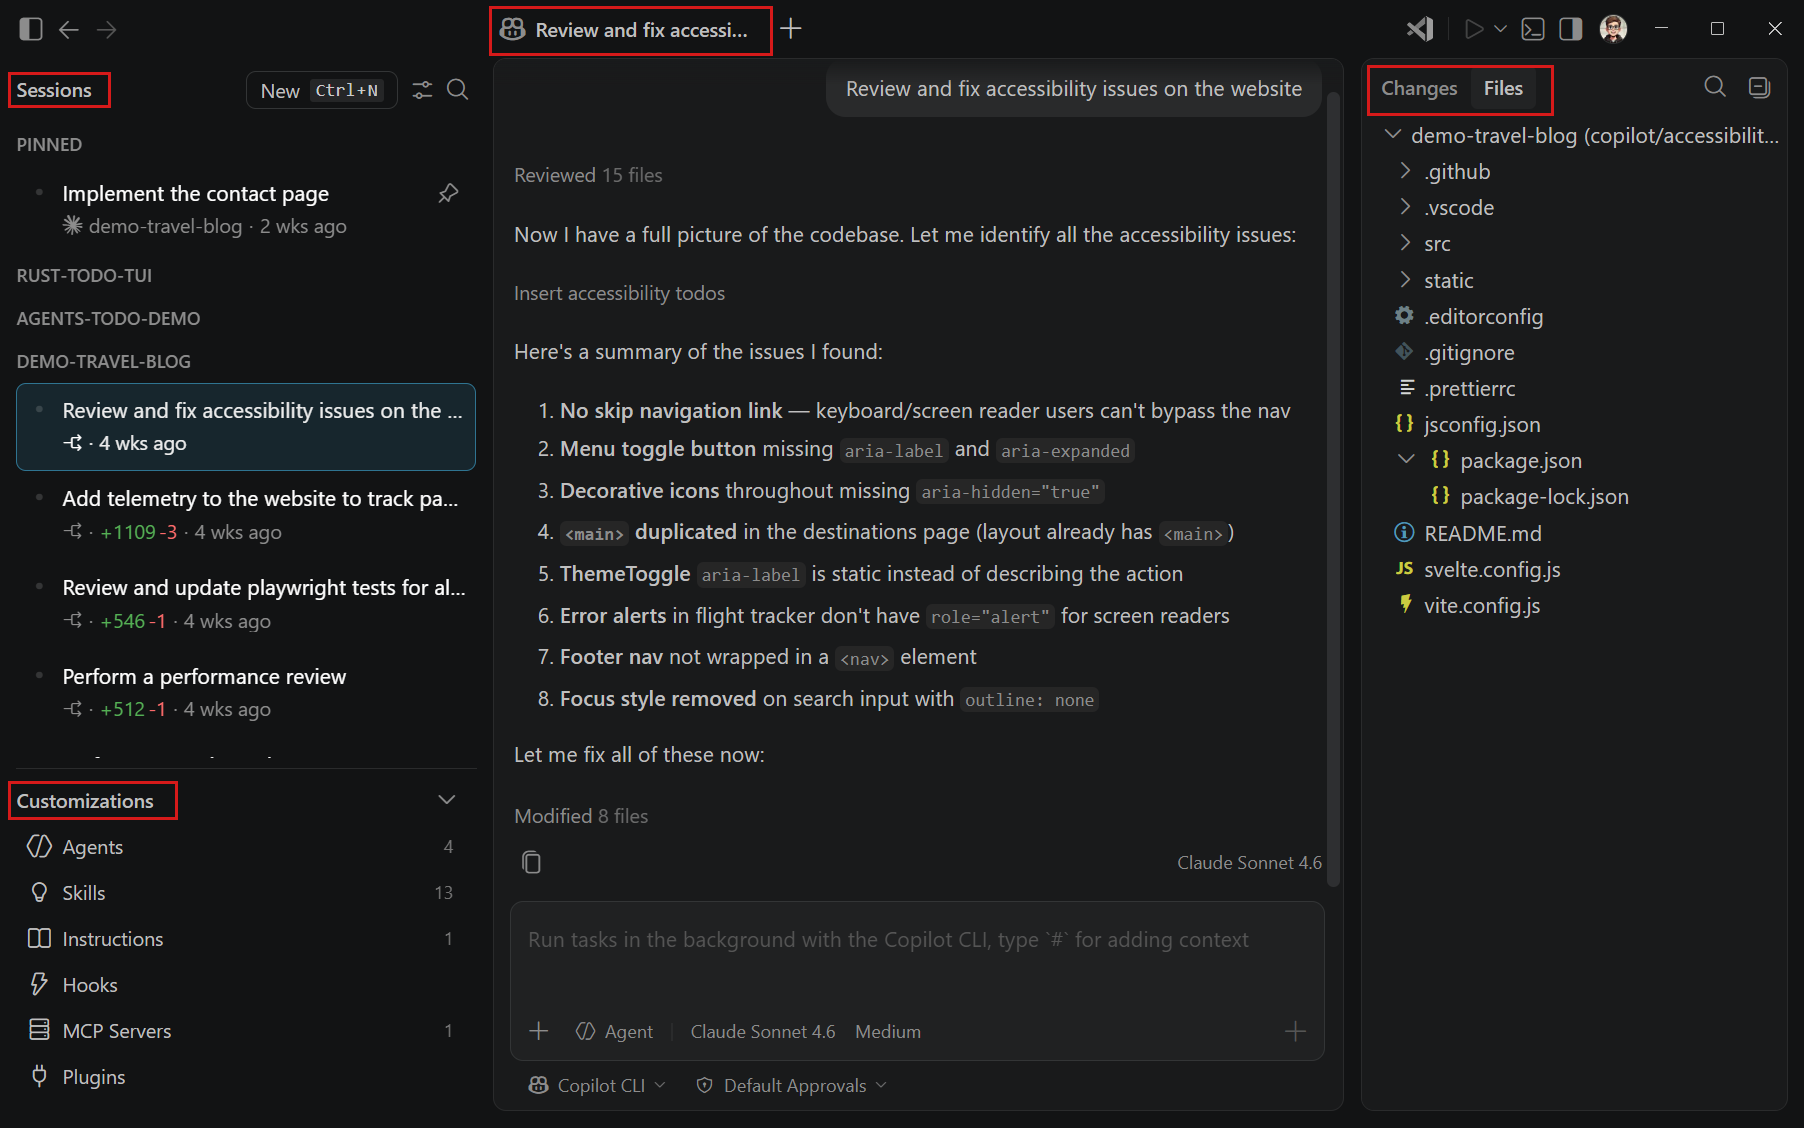
The Agents window has the following main areas:
-
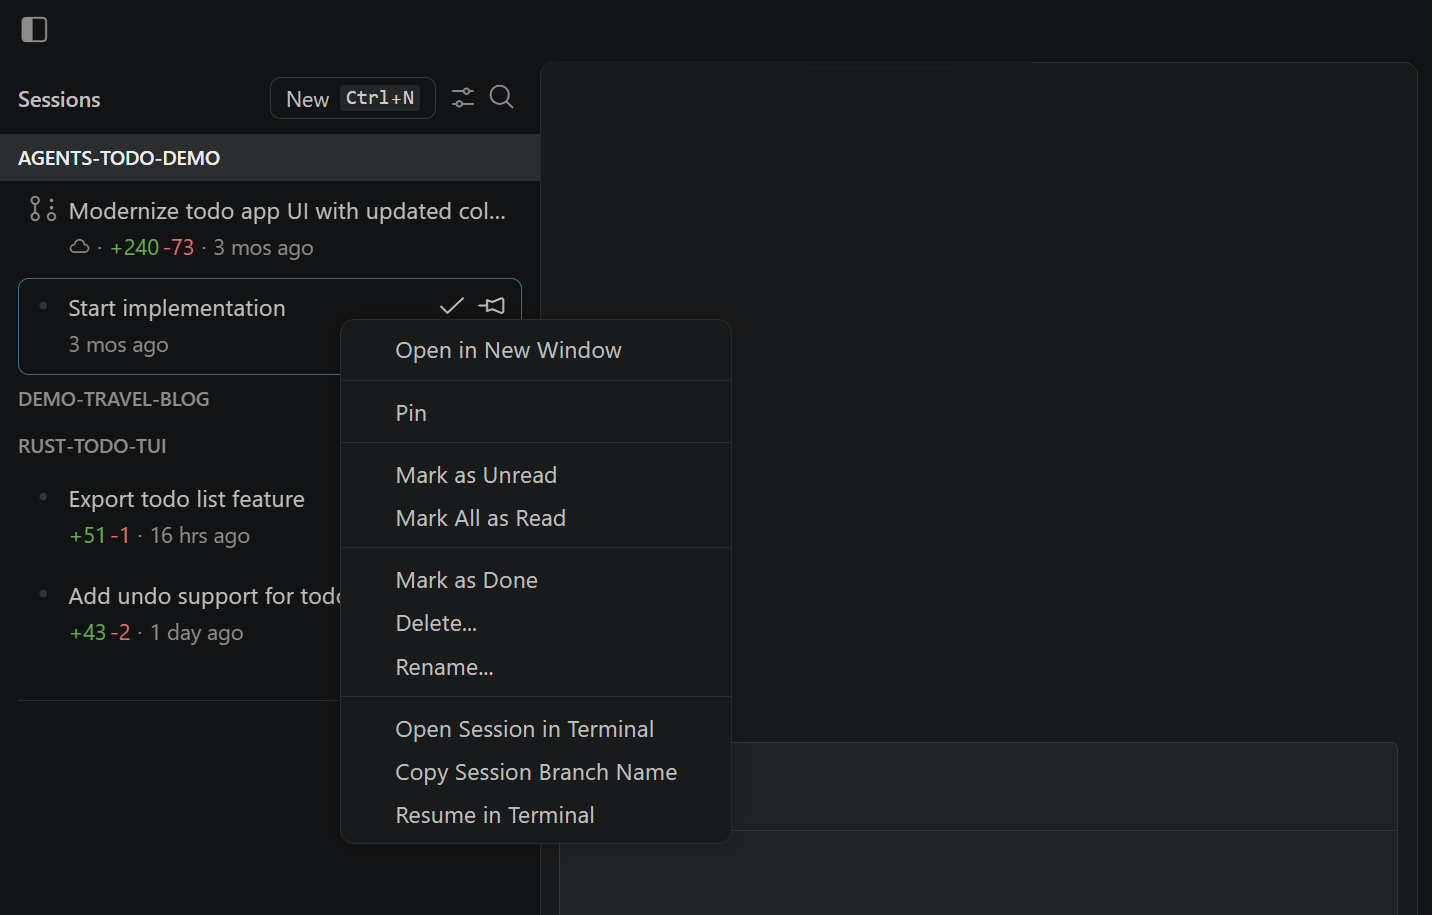
Sessions list: in the sidebar, where you can view and manage all your sessions across workspaces. By default, sessions are grouped by workspace. Right-click a session to see more commands, such as renaming, marking as done, pinning, and more.
-
Customizations panel: below the sessions list, where you can access your agent customizations to tailor the agent behavior to your workflow and preferences.
-
Chat area: in the center, where you see the chat conversation history and where you can interact with the agent through prompts. You can open multiple session views side by side to compare or review work in parallel.
-
Changes panel: on the right, where you can review file changes and other artifacts generated by your agent during a session, and view a file explorer of the workspace.
Start an agent session
The Agents window and the main VS Code window share the same underlying agent sessions (Copilot CLI, Copilot cloud, and Claude agent). This means that any session you start in the Agents window is immediately available in the main VS Code window.
Unlike the Chat view, where sessions are scoped to the open workspace, the Agents window lets you choose which workspace or repository to target when you start a session.
To start a new agent session in the Agents window:
-
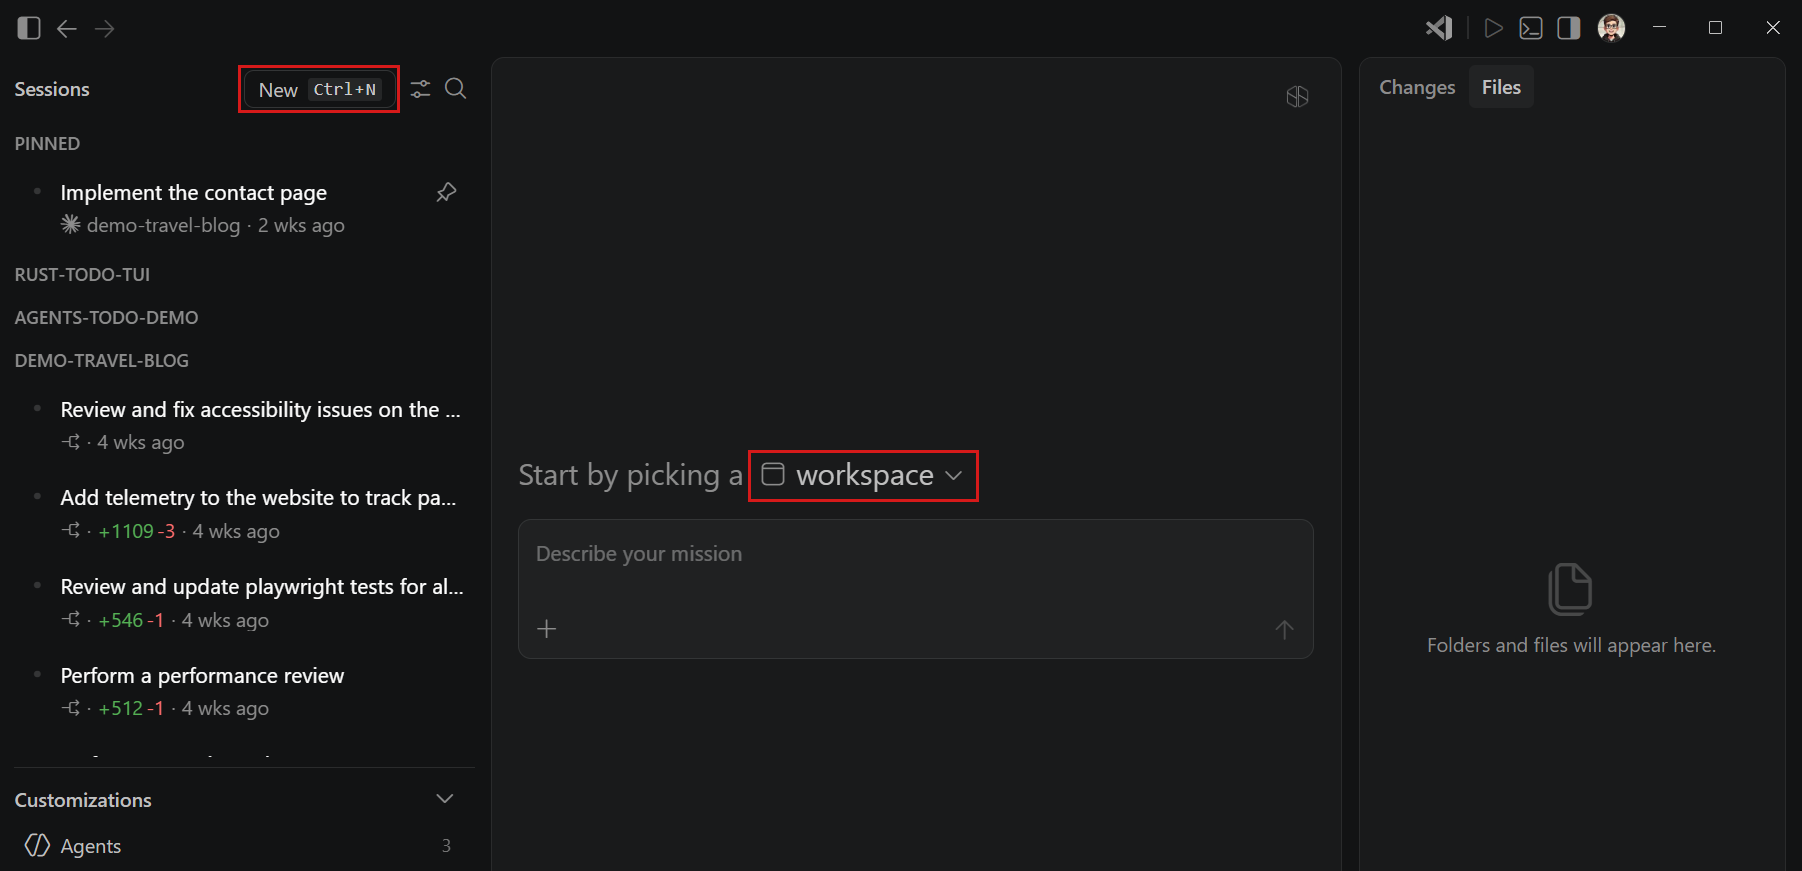
Select New at the top of the sidebar or press ⌘N (Windows, Linux Ctrl+N).
-
Use the workspace dropdown to select a local folder or GitHub repository for your chat session.
You can directly start a session scoped to a specific workspace by hovering over a workspace in the sessions list and selecting + (New Session).
If the folder or repository you select isn't trusted yet, you'll be prompted to trust it before you can start a session.
TipYou can track and create sessions that run on a remote machine via SSH or a dev tunnel. See remote agent sessions for more information.
-
After selecting the workspace, choose the agent type for the session from the dropdown.
The available agent types might vary depending on the location of the workspace:
- Folder: choose between the Copilot CLI or Claude agent. You can select Continue In to hand off the session to a Copilot Cloud agent at any time.
- Repository: sessions started in a GitHub repository use the Copilot cloud agent.
-
Optionally, select extra configuration options for the session like a custom agent, language model, permission level, and more.
You can change these at any point during the session. Learn more about configuring your agent session.
-
Type a prompt that describes what you want to accomplish, and press Enter.
The agent now starts working on your request. Learn more about interacting in chat.
Manage your sessions
The session list in the sidebar shows all your ongoing sessions across your workspaces. Each session item surfaces the key information such as session name, workspace, agent type, and file change stats.
By default, sessions are grouped by workspace and you can also group on timeframe. See Manage Sessions for more details on working with the session list.
When you select a session in the list, the chat panel shows the complete history of that session. This session then becomes the active session and the Changes panel surfaces the latest file updates from the agent in that session and the files in the associated workspace.
Manage and review file changes
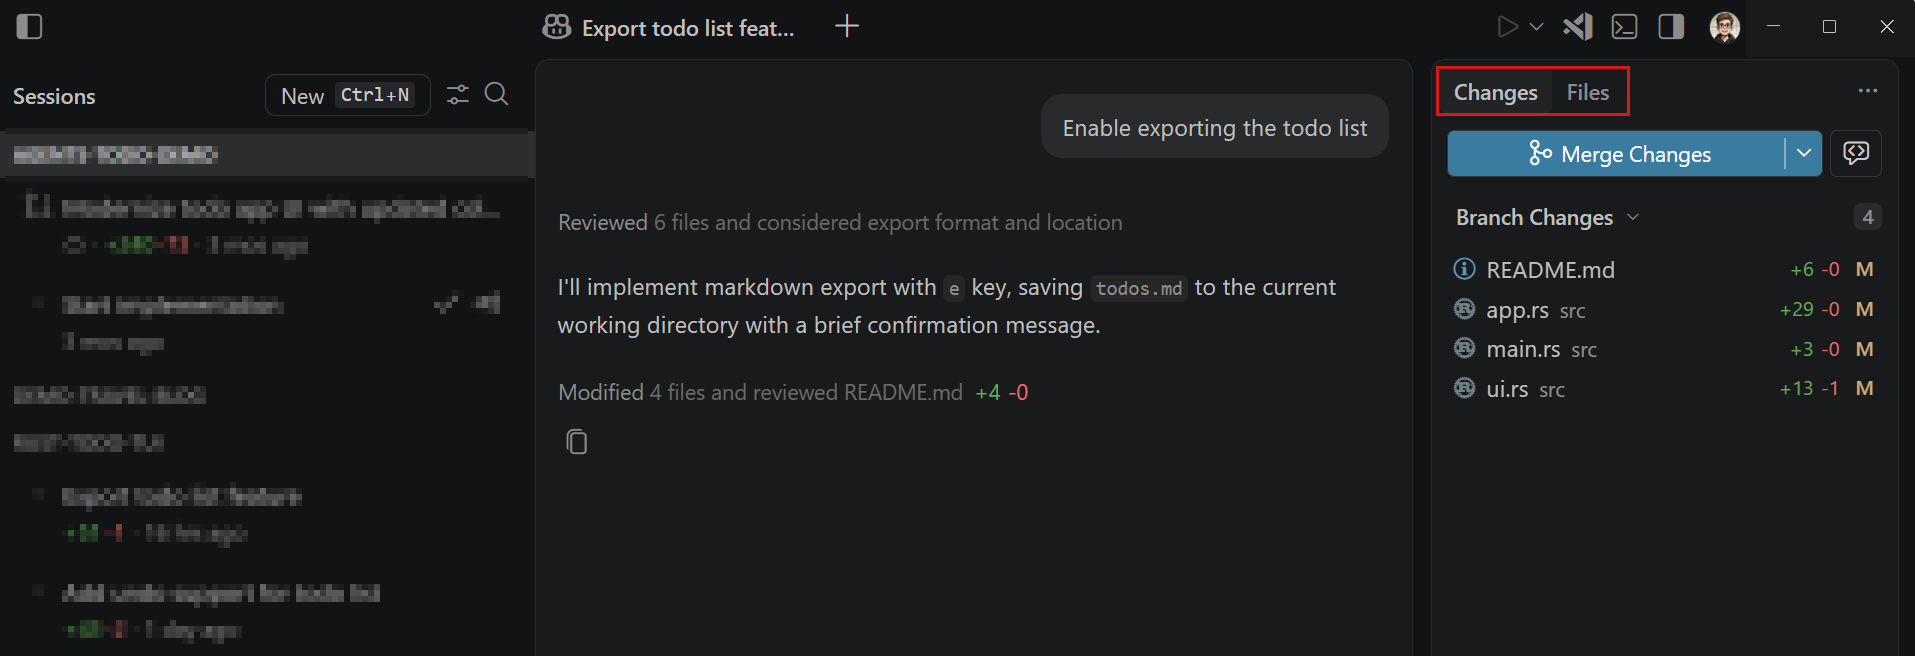
The Changes panel in the Agents window provides a dedicated view with detailed information about the files and agent edits made during a session. The Changes panel is split into two main tabs:
- Files tab: a file explorer view of all files in the workspace.
- Changes tab: a list of files that have been changed, added, or deleted by the agent. Select the Branch Changes dropdown to choose which changes to view.
To review changes made by the agent, select a file in the Changes tab to open a diff view that shows the edits the agent has made compared to the current state of the workspace.
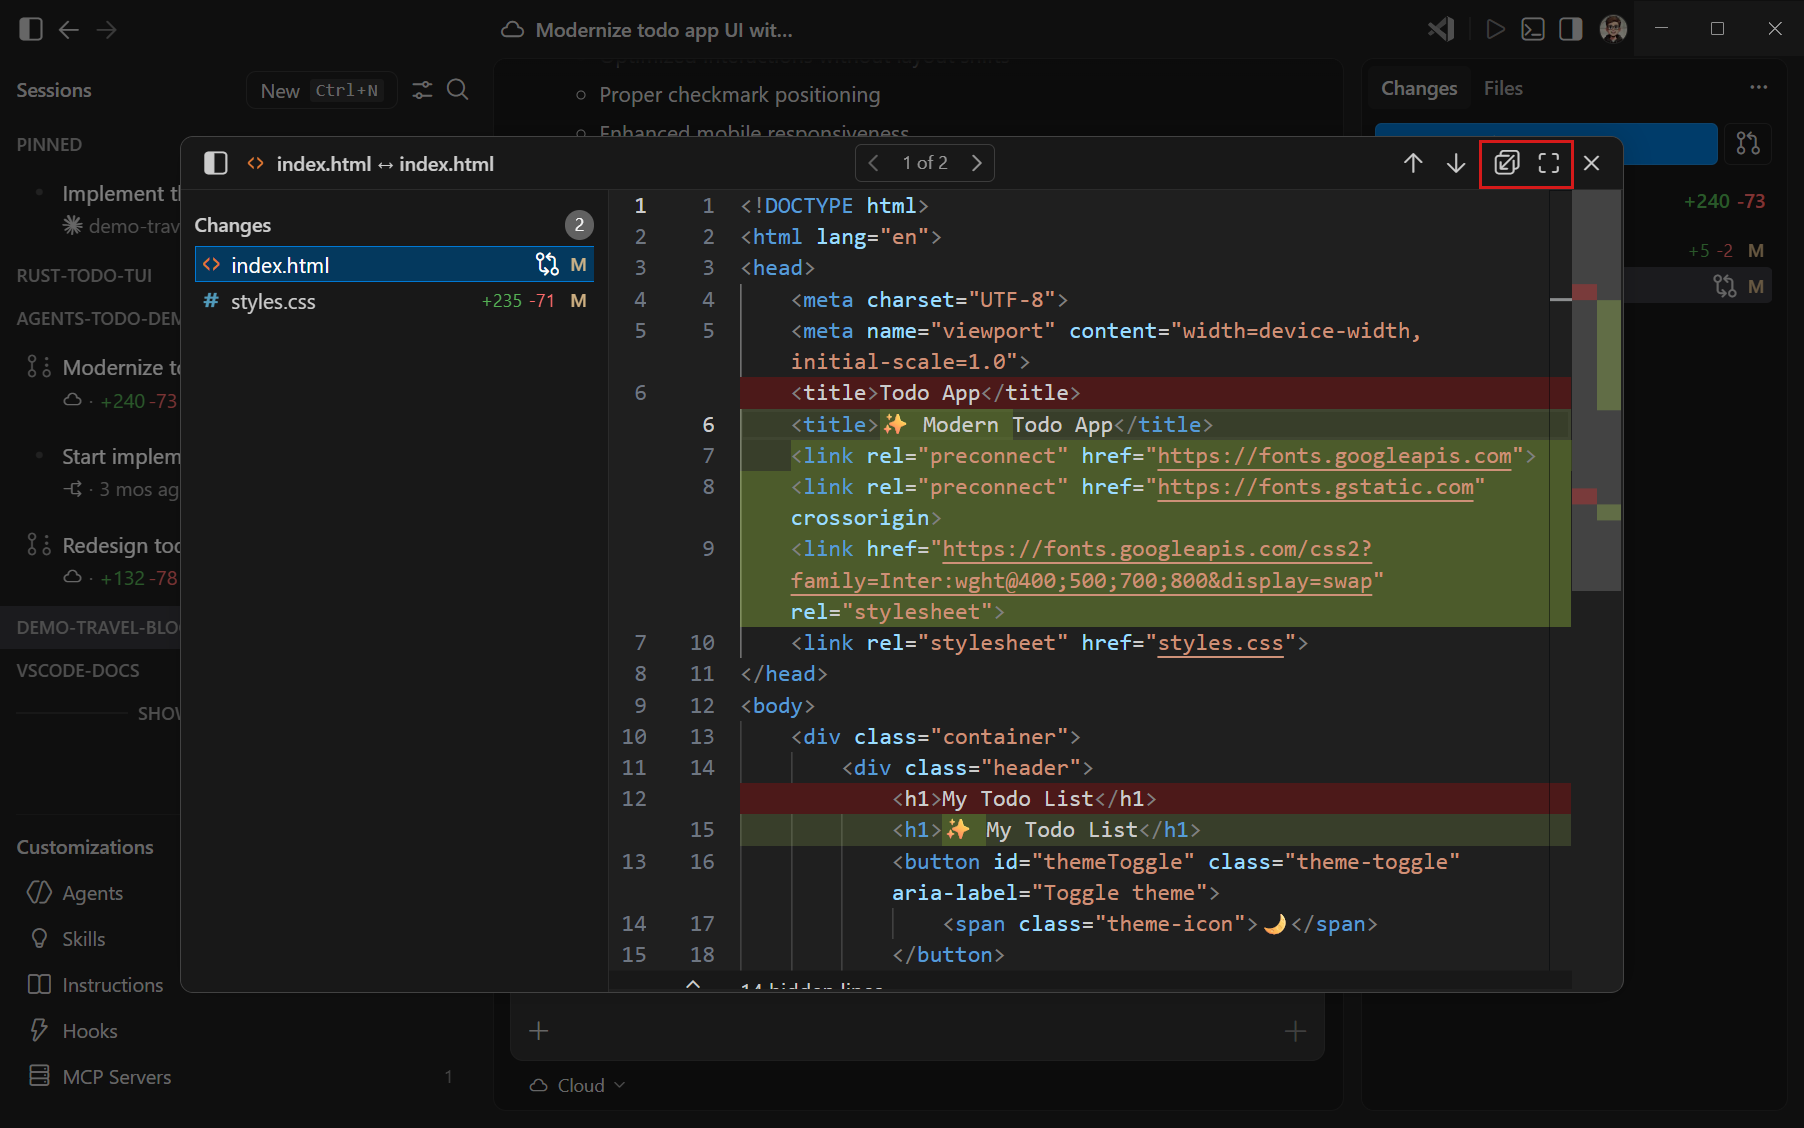
You can open the diff view side-by-side with the Chat view inside the Agents window or open it in a modal window to focus on the changes. Use the layout controls in the diff view toolbar to toggle between different display modes.
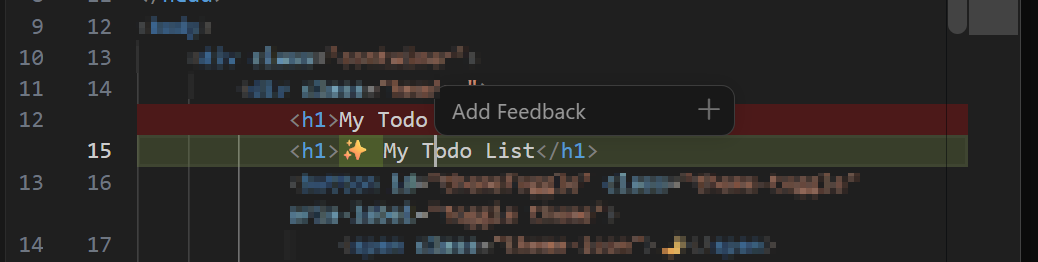
While reviewing the changes in the diff view, click inside an edit and then select Add Feedback to enter a feedback comment directly in the file and signal the agent to make adjustments.
After reviewing the changes, the Changes panel provides the following options to act on the edits made by the agent:
- Commit: when using folder isolation, commit the changes made by the agent directly to your workspace.
- Merge: when using worktree isolation, merge (and optionally sync upstream) and create a pull request.
- Checkout: for Copilot Cloud sessions, check out the branch associated with the session's pull request locally to review or request further edits.
- Discard: discard one or more edits directly from the Changes panel if you don't want to keep them.
When you create a new session, the Files panel includes a sync button that lets you pull in upstream changes from the base branch before the agent gets to work. This helps the agent start from the latest state of your branch and reduces the chance of merge conflicts when you bring its changes back.
Validate agent changes locally
In addition to reviewing changes in the Changes panel, you can also validate the edits made by the agent locally before committing or merging them. The Agents window supports running tasks and commands in the context of the current session. For example, you can run a build or tests to ensure that the changes made by the agent do not break your project, or start a development server to verify that the edits behave as expected in a running environment.
To configure tasks in the Agents window:
-
Start or open a session.
-
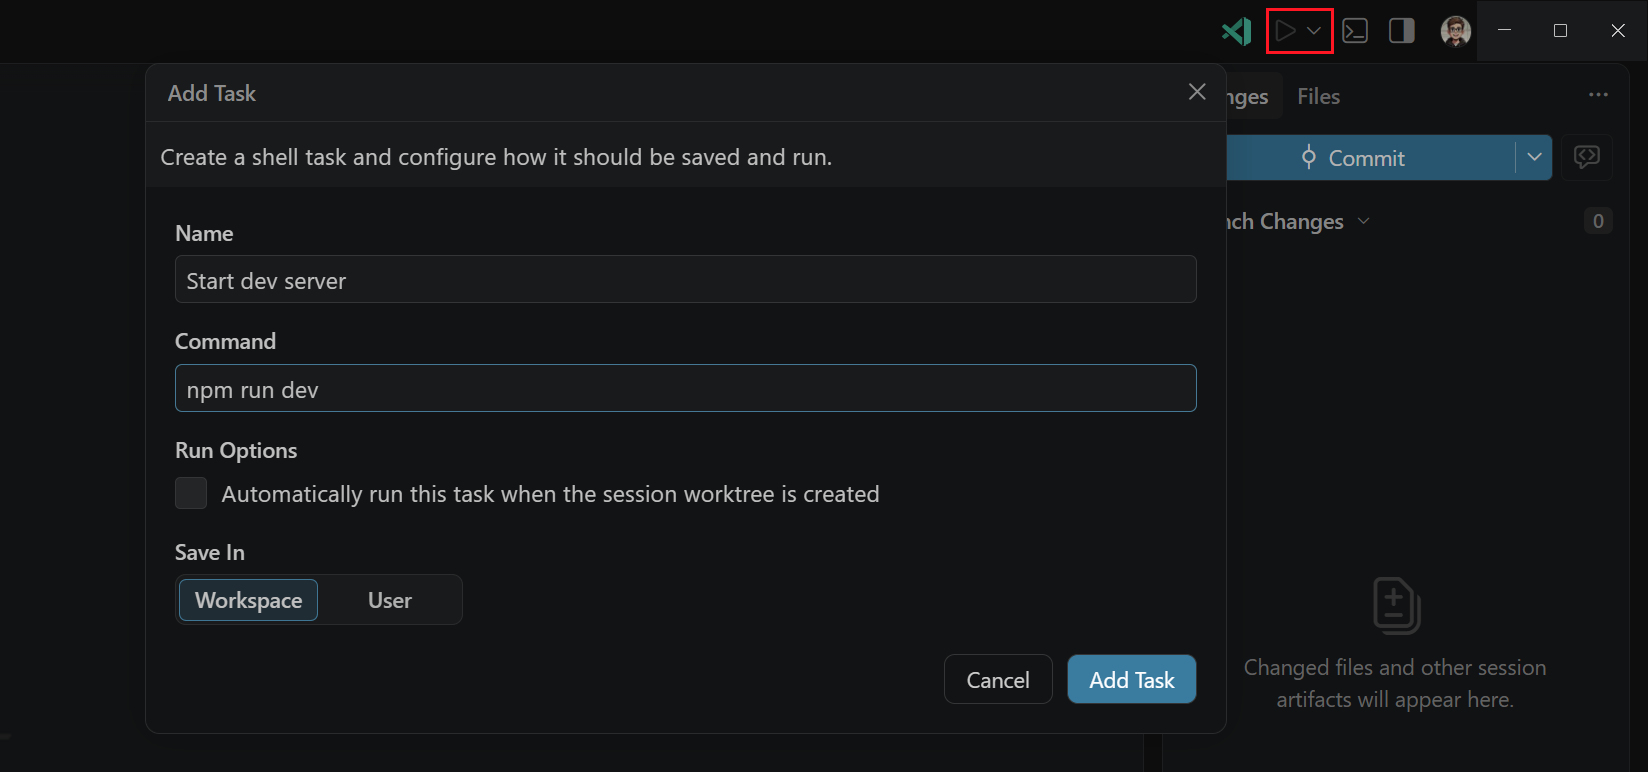
Select the Tasks dropdown in the title bar and select Add Task.
-
Provide the task details:
- Name: a descriptive name for the task.
- Command: the command to run when the task is executed (for example,
npm run buildorpytest). - Run Options: automatically run the task when the session worktree is created.
- Save In: choose whether to save the task configuration in the workspace or your user profile for reuse across projects.
-
Select Add Task to save the task configuration.
Once the task is configured, it will appear in the Tasks dropdown, and you can run it in the context of the current session to validate the changes made by the agent.
If your application involves browser-based behavior, you can use the integrated browser in the Agents window. Select a localhost link from the chat session to open it in the integrated browser inside the Agents window. The browser tab will persist across session switches, so if you open another session, the browser tab will open to the same page you had open previously and preserve the state of that page.
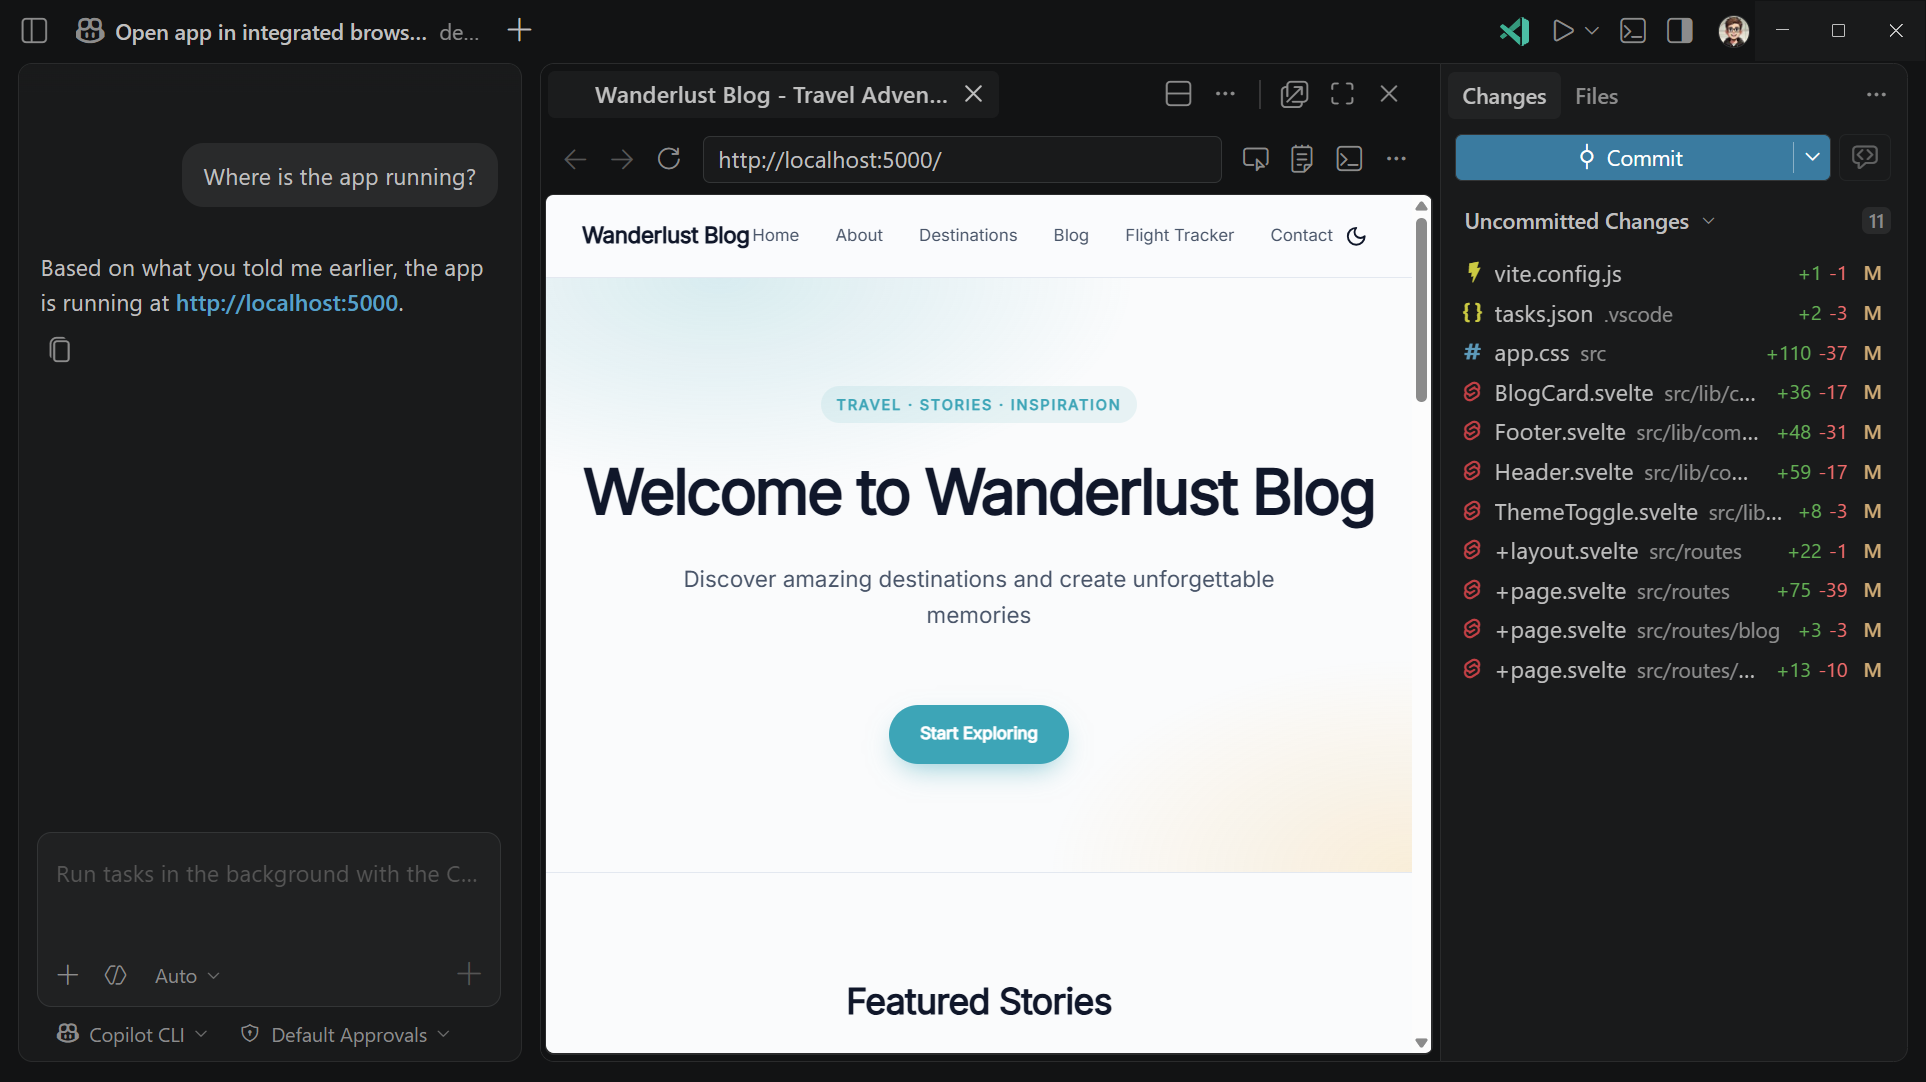
Alternatively, you can also select a localhost link from the integrated terminal or open the integrated browser with the Open Integrated Browser command from the Command Palette (⇧⌘P (Windows, Linux Ctrl+Shift+P)). You can use the layout controls in the integrated browser to show it as a modal window or embedded in the Agents window layout alongside other views.
If you want to run terminal commands in the context of the current session, select the Open Terminal icon in the title bar to open an integrated terminal with its current working directory set to the session's folder or worktree.
Work with agents remotely
The Agents window lets you work with agents on remote machines and from any device with a browser.
-
Browser-based access: open https://insiders.vscode.dev/agents to manage agent sessions from any device, including mobile. The browser-based Agents window connects to your development machine through a dev tunnel and provides the full session management experience without installing Visual Studio Code locally.
-
SSH: connect to a remote machine over SSH directly from the workspace dropdown. The Agents window automatically installs and starts the VS Code CLI on the remote machine.
-
Dev tunnels: connect to a machine running a dev tunnel to start sessions or check in on existing ones.
Learn more about setting up and using remote connections in remote agent sessions.
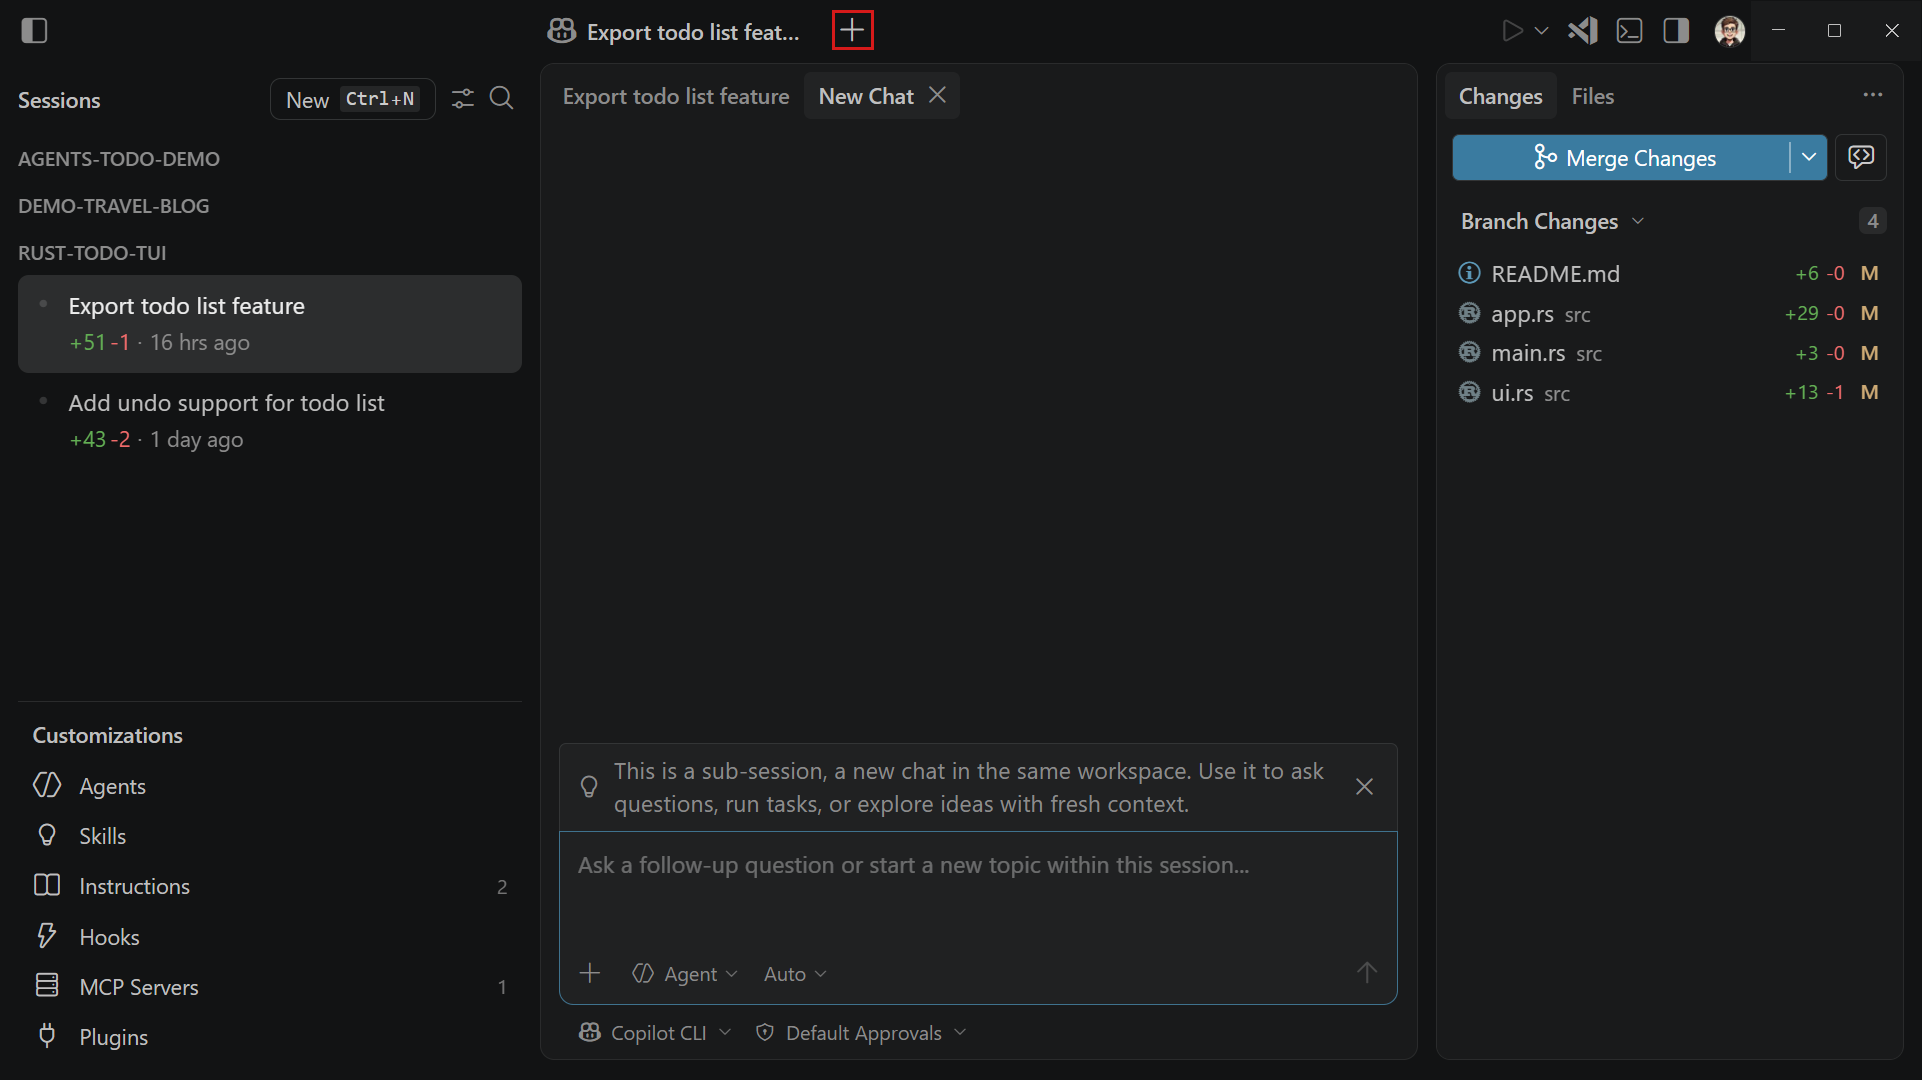
Create a sub-session
When you have an active session, you can start a sub-session to give the agent a separate, parallel task within the same workspace. A sub-session shares the same workspace and worktree as the parent session, but starts with a blank chat. The sub-session doesn't carry over the parent's conversation history.
This is useful when you want to work on an independent task in the same project without interrupting the ongoing session or starting a completely new one from scratch.
To create a sub-session:
-
In an active session, select New Sub-Session (
+) in the window title bar.Notice that a new tab appears in the chat area for the sub-session, alongside the tab for the parent session. The sub-session does not appear as a separate item in the sessions list.
-
Type a prompt and press Enter to start the sub-session.
To explore an alternative direction from a specific point in a session's conversation, fork the session. Forking a session creates a new independent session with a copy of the conversation history up to a specific point.
Open multiple sessions side by side
You can have more than one session open at the same time in the Agents window to compare results or review work in parallel. Open a session next to the active one by using any of the following methods:
- Right-click a session in the sessions list and select Open to the Side.
- Drag and drop a session from the sessions list into the view area.
- Hold Alt and select a session in the sessions list.
Only one session view is active at any time. The Terminal, Files, and Changes views always reflect the active session. By default, selecting a session in the sessions list replaces the active view. Pin a session view (top-right toolbar) to prevent it from being replaced.
Customize agents for your project and workflow
The Customizations panel gives you direct access to all AI customization options:
| Customization | What it does |
|---|---|
| Agents | Define custom agent personas with specific tools and instructions. Learn more. |
| Skills | Add portable instruction folders that agents load when relevant. Learn more. |
| Instructions | Set guidelines that shape how the AI generates code. Learn more. |
| Hooks | Run shell commands at lifecycle points during agent sessions. Learn more. |
| MCP Servers | Connect AI to external tools and services via the MCP standard. Learn more. |
| Plugins | Install prepackaged bundles of customizations. Learn more. |
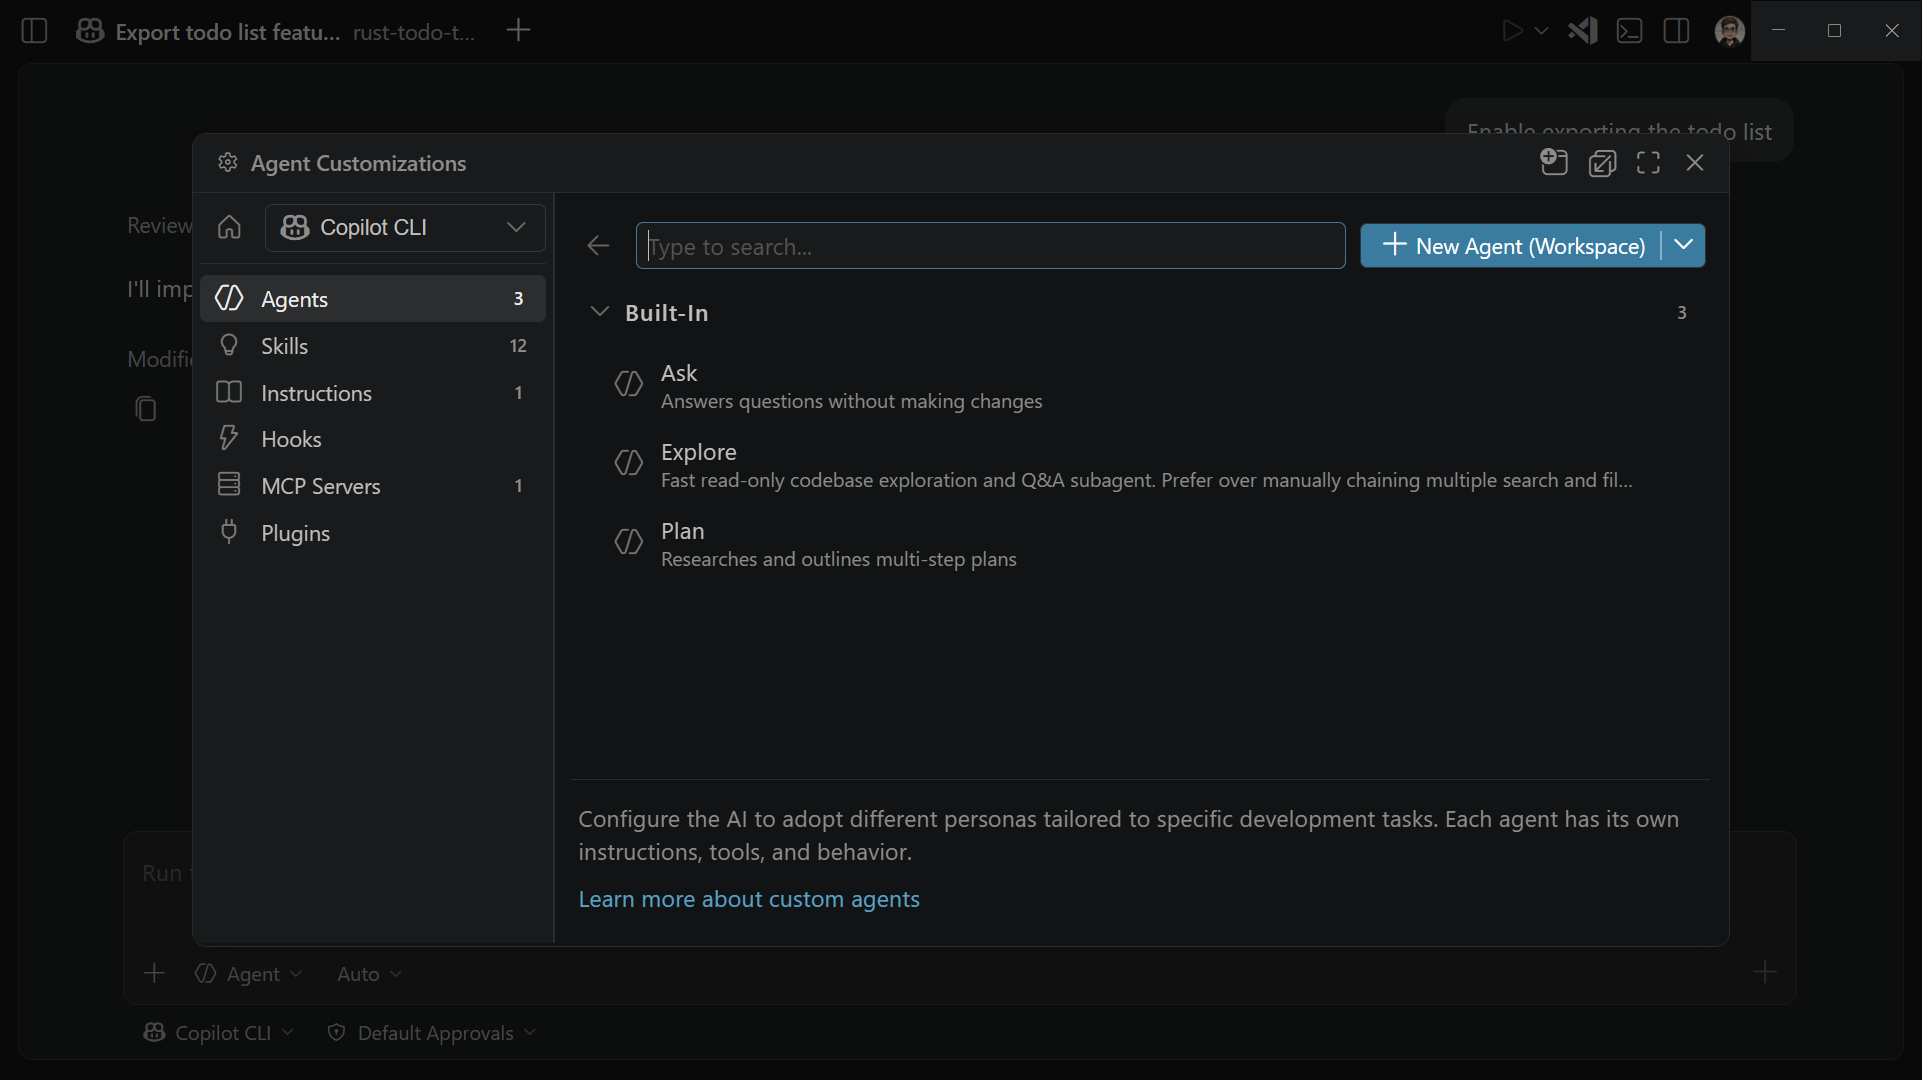
The Agent Customizations panel enables you to easily manage all your customizations in one place:
- View and edit existing customizations for the project (workspace), or across all your projects (user).
- Add new customzations by using the built-in editor or by generating them from a prompt.
- Install plugins or MCP servers from the marketplace.
- Enable or disable customizations without removing them.
Use the dropdown in the top left of the Agent Customizations panel to choose which agent the customizations should apply to.
Trust a folder
When you first open a new folder or repository in the Agents window, you're prompted to trust the folder and its subfolders. Folder trust is a security measure that prevents agents from running in untrusted folders, which could result in malicious code being executed on your machine.
If you choose not to trust the folder, you can't start or continue agent sessions for that folder in the Agents window.
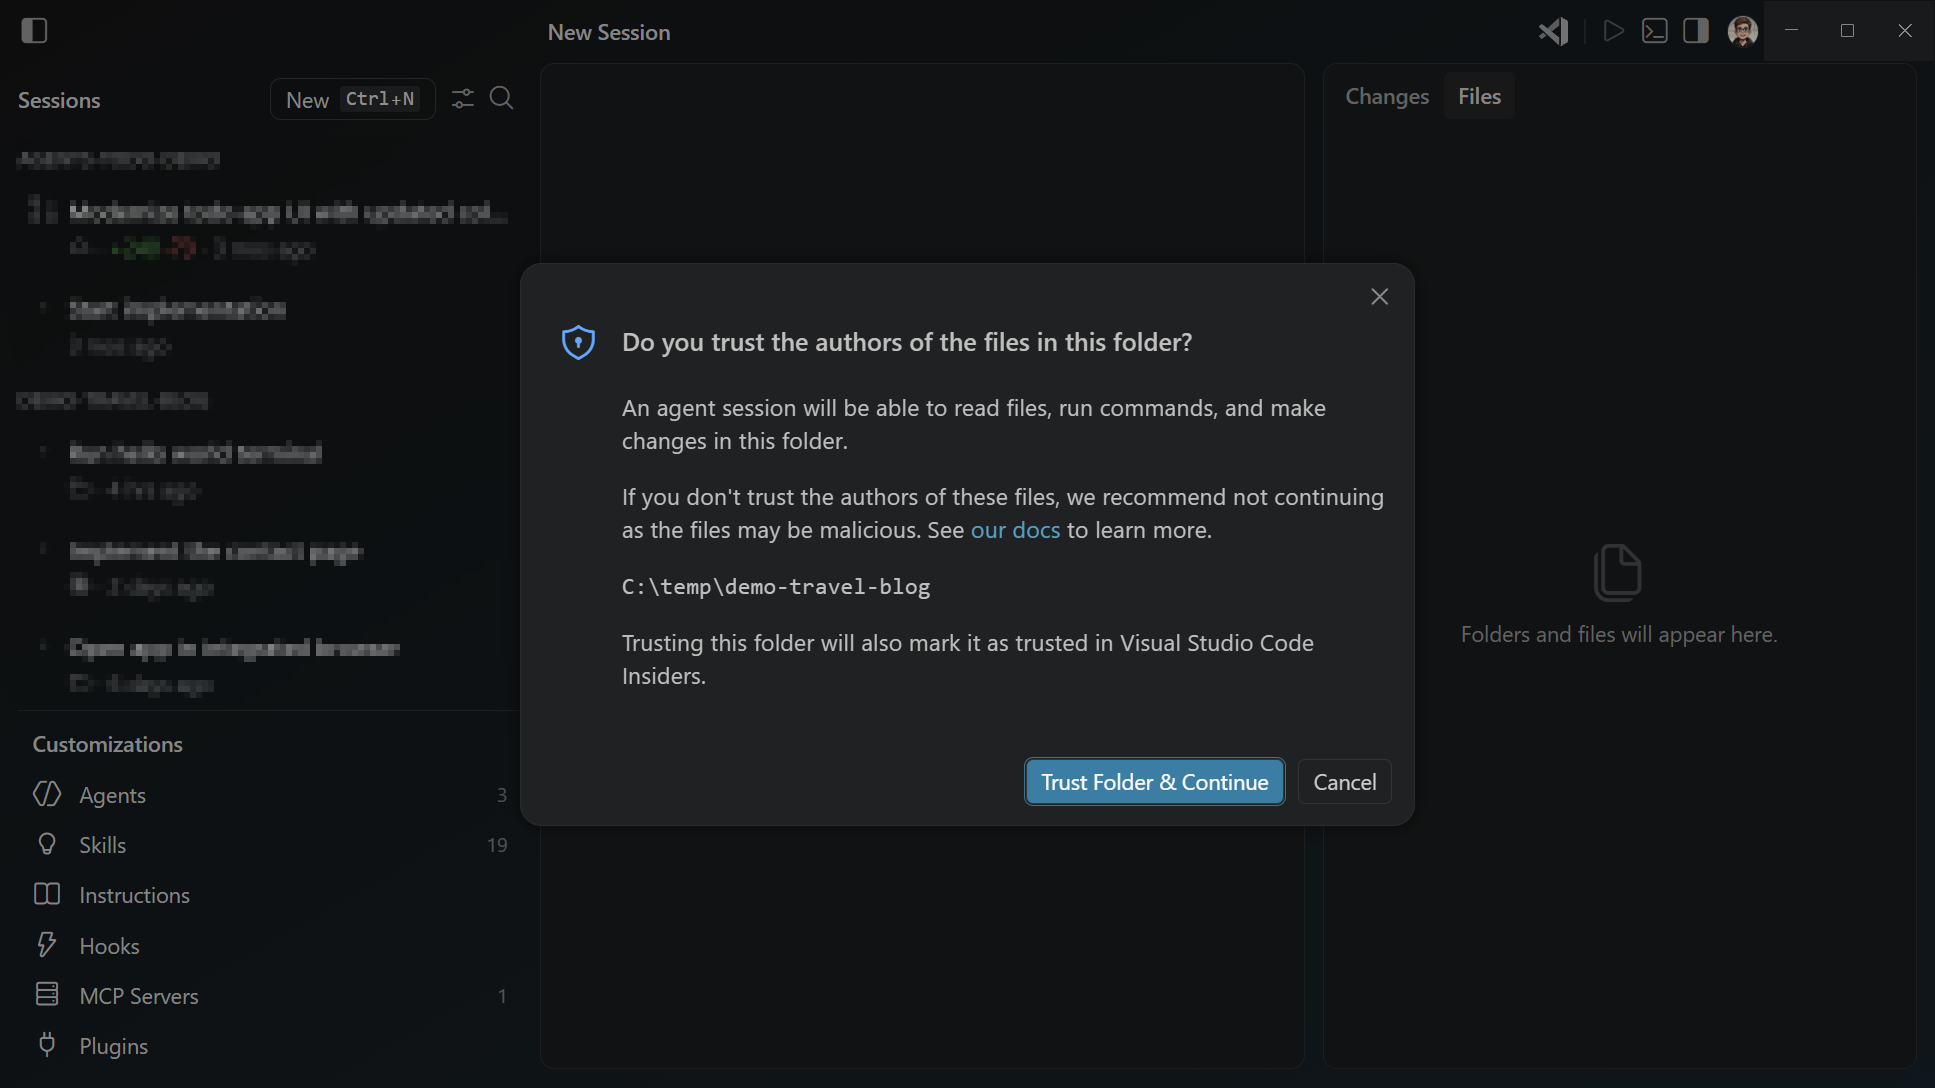
The Agents window shares the same workspace trust state with the main VS Code window. If you trust a folder in VS Code, it is also trusted in the Agents window, and vice versa. Learn more about workspace trust in the Workspace Trust documentation.
Switch to another GitHub account
To use a different GitHub account in the Agents window, select the account icon in the top right corner of the window and choose Sign out. After signing out, select Sign in to authenticate with a different GitHub account.
Configure settings for the Agents window
The Agents window shares all of your VS Code settings, so the configuration you've already invested in carries over automatically. When you want different behavior in the Agents window than in the editor window, you can override specific settings just for the Agents window without affecting your main VS Code setup.
To override a setting for the Agents window only, edit your settings file and scope the value under the Agents window section. Open the Settings editor (⌘, (Windows, Linux Ctrl+,)) from the Agents window to see which scope a setting applies to.
Use VS Code extensions in the Agents window
The Agents window can run your VS Code extensions, so you can bring the tools you rely on into your agent-first workflow.
Extensions that contribute only static content, such as themes, grammars, languages, and keybindings, activate in the Agents window automatically. We also tested the top 100 Marketplace extensions, and some of those activate as well when installed in your default VS Code profile.
For other extensions, you can opt them in by ID with the extensions.supportAgentsWindow setting:
"extensions.supportAgentsWindow": {
    "myextension.id": true
}
Keep the following in mind when enabling extensions:
- Any extension you enable this way must be installed in your default VS Code profile.
- Extension support is still evolving. If an extension doesn't behave as expected in the Agents window, please file an issue so we can discuss.
If you're an extension author, we'd love to collaborate on what extension enablement in the Agents window unlocks. Whether you'd like to ideate on new scenarios that take advantage of running agents across projects, or share feedback on how your existing extension behaves in the Agents window, share feedback and ideas via GitHub issues.
Limitations
-
The agent can't directly open the integrated browser for you for now. You can start the integrated browser from the Command Palette (Browser: Open Integrated Browser) or by selecting a
localhostlink in the Agents window. -
The Agents window currently only supports the following agent types: Copilot CLI, Copilot Cloud, and Claude agent. To use local or other third-party agents, manage your sessions from the main VS Code window.
-
Copilot Cloud sessions are only supported for GitHub-backed repositories. For non-GitHub projects, you can still use Copilot CLI in the Agents window.
-
The agents dropdown currently doesn't have the plan agent. You can still use the
/plancommand in a Copilot CLI or Claude agent session. In Copilot CLI sessions, the plan agent is also automatically invoked when you refer ask for creating a plan in your prompt. -
Sub-sessions are currently not yet supported for Claude agent sessions.
-
Multi-root sessions are not yet supported in the Agents window. You can ask the agent to work across projects in a single session.
Frequently asked questions
When should I use the Agents window?
Use the Agents window when you want a streamlined, agent-first workflow inside VS Code. It provides a focused interface built around orchestrating agents end-to-end (validation, review, PRs) across multiple projects, with agent customization (plugins, skills, MCP) front and center.
Use the main VS Code window when you want the full-featured editor with debugging, notebooks, the extension ecosystem, and remote development, where AI assists your coding rather than being the central experience.
Both surfaces support agentic development: the Agents window is purpose-built for it, while the main VS Code window offers it alongside everything else.
Can I continue sessions started in the main VS Code window in the Agents window?
Yes, sessions started in the main VS Code window with supported agent types (Copilot CLI, Copilot Cloud, and Claude agent) automatically appear in the Agents window. You can switch between the two surfaces without losing any session history or context.
Can I use the Agents window with local or third-party CLI agents?
The Agents window currently only supports sessions with Copilot CLI, Copilot Cloud, and Claude agent. If you use local or third-party CLI agents, you can still manage those sessions from the main VS Code window, but they won't yet appear in the Agents window.
Why are changes from a Copilot CLI session not applied in my main workspace?
By default, Copilot CLI sessions from the Agents window are created with Git worktree isolation. This means that the agent operates in a separate folder created by Git worktree, which keeps changes isolated from your main workspace until you're ready to merge them. This allows you to review and test the agent's changes before integrating them into your main codebase.
You can merge the worktree from the Agents window back into your main workspace or create a pull request to review the changes.
How do I install and update the Agents window?
The Agents window is built into VS Code Insiders and updates alongside it. No additional installation or setup is needed.
Can I use the integrated browser in the Agents window?
Yes. You can access the integrated browser via the run menu in the top right of the Agents window, run the command Browser: Open Integrated Browser, or select a localhost link in the Agents window to open the integrated browser.
Next steps
- Chat overview - add context, write effective prompts, and review changes.
- Manage chat sessions - checkpoints, forking, archiving, and exporting sessions.
- Remote agent sessions - SSH, dev tunnels, and browser-based access.